When Google introduced their new launcher alongside the Nexus 5, one of the most innovative features was the "always listening" voice search, meaning that at any time you were on your home screen, triggering a Google search was as simple as saying "Okay, Google."
Combined with the unparalleled accuracy of Google's voice recognition service, all of the information found in a Google search that was once at your fingertips was now at the tip of your tongue.
As simple as this makes it to launch a voice search, the functionality it offers almost feels like a tease. Sure, Google Now lets you set alarms and reminders, but you can't do something as simple as toggling Wi-Fi or Bluetooth with it.
If your Nexus 5 will listen to what you say, why not make it hear more?
That's where the Xposed module Google Search API comes in, created by developer MohammadAG (whose mods we've covered numerous times here on softModder). Throw in some Tasker profiles with AutoVoice, and the possibilities become endless.
Prerequisites
- A rooted Nexus 5 with the Xposed Framework installed.
- Installation of apps from "Unknown sources" needs to be allowed.
- If you're using any other launcher, you'll need the Nexus 5's stock home screen app, also known as the Google Now Launcher.
- Tasker with AutoVoice for custom commands (optional).
Step 1: Install the Google Search API Module for Xposed
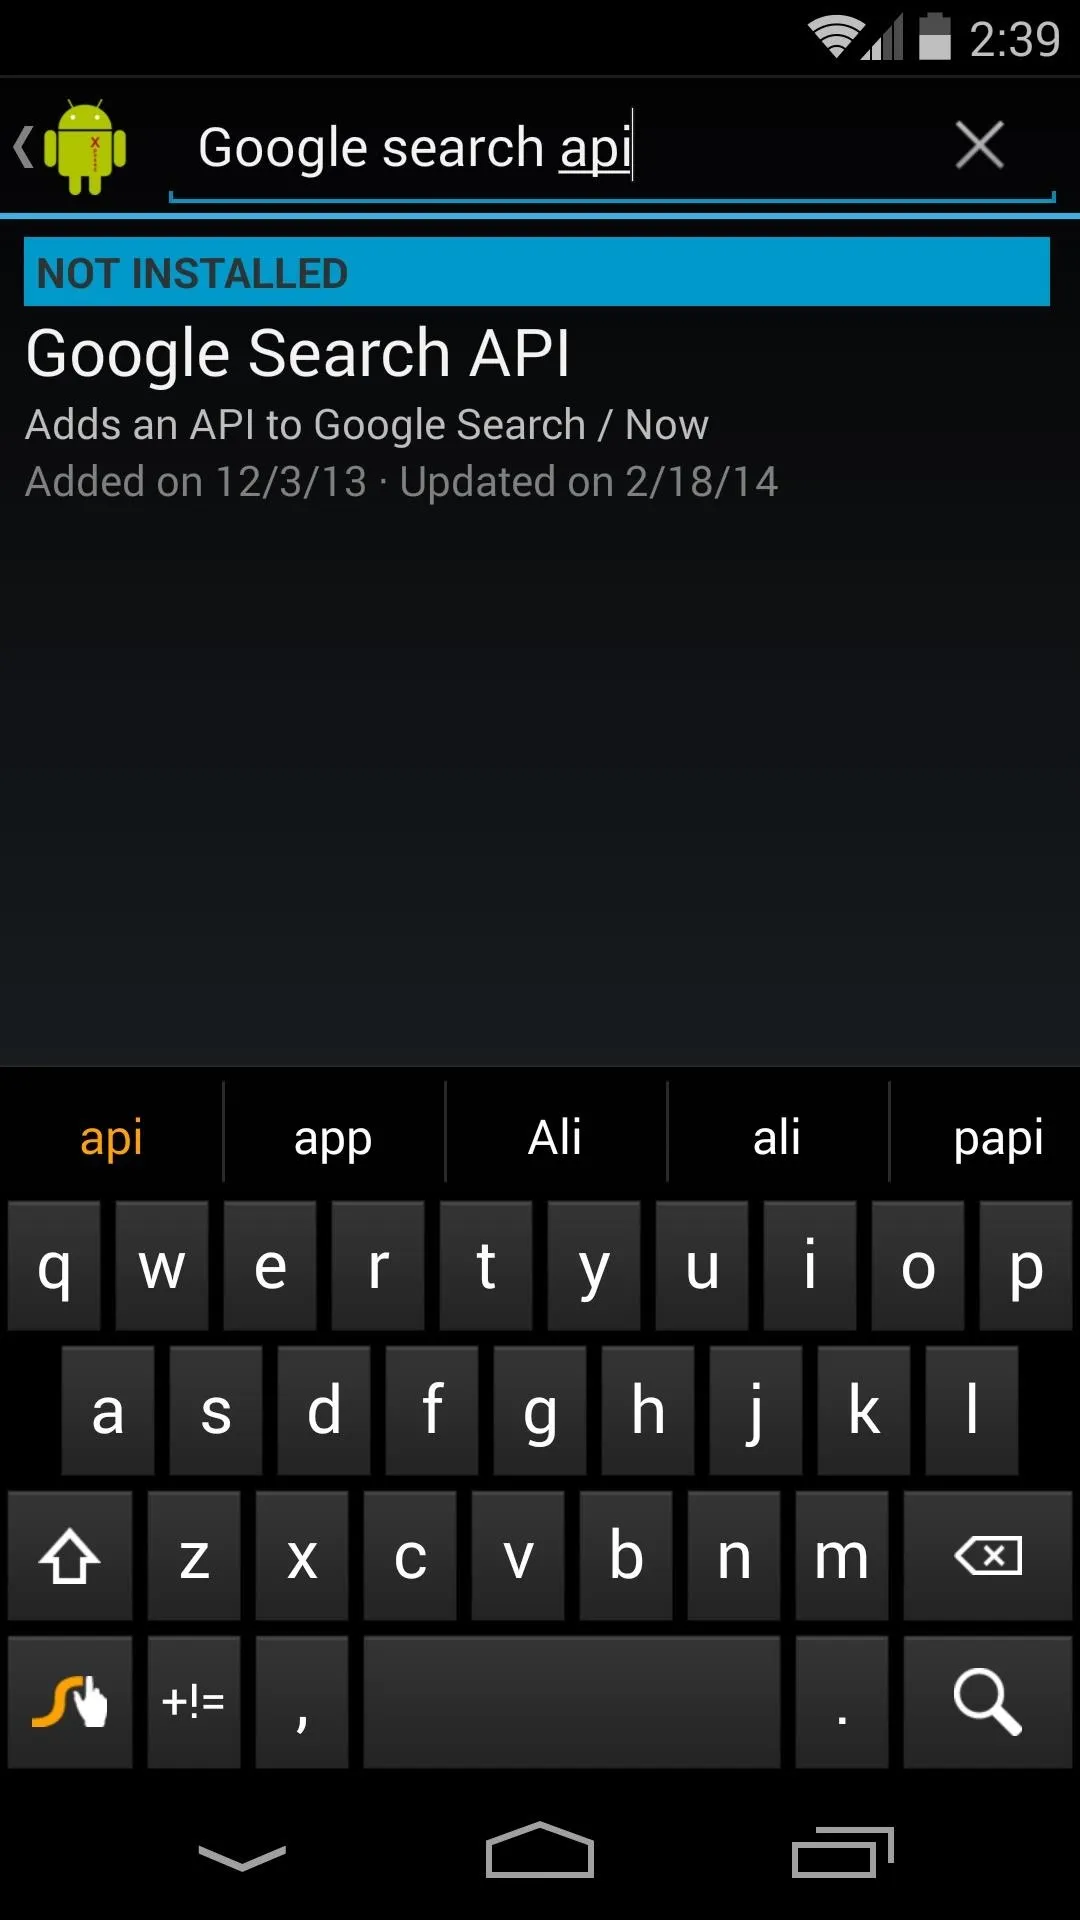
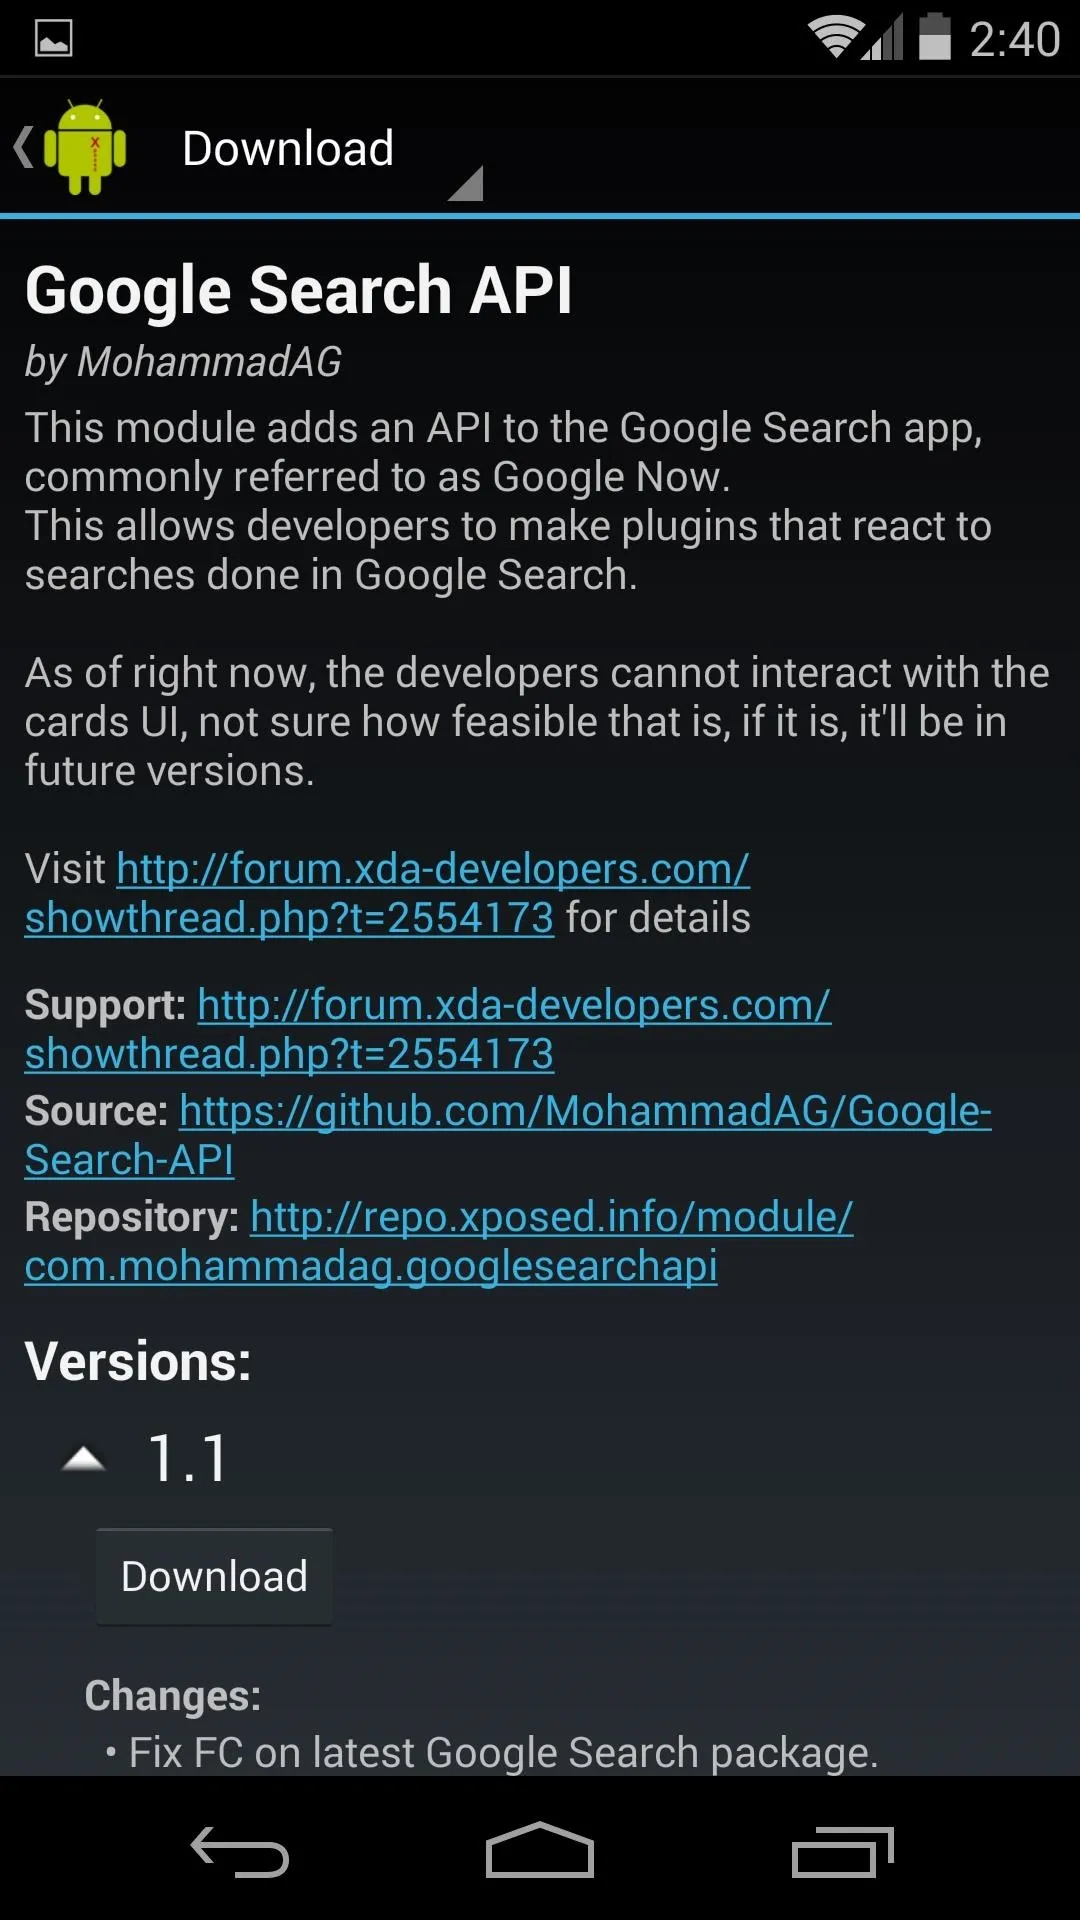
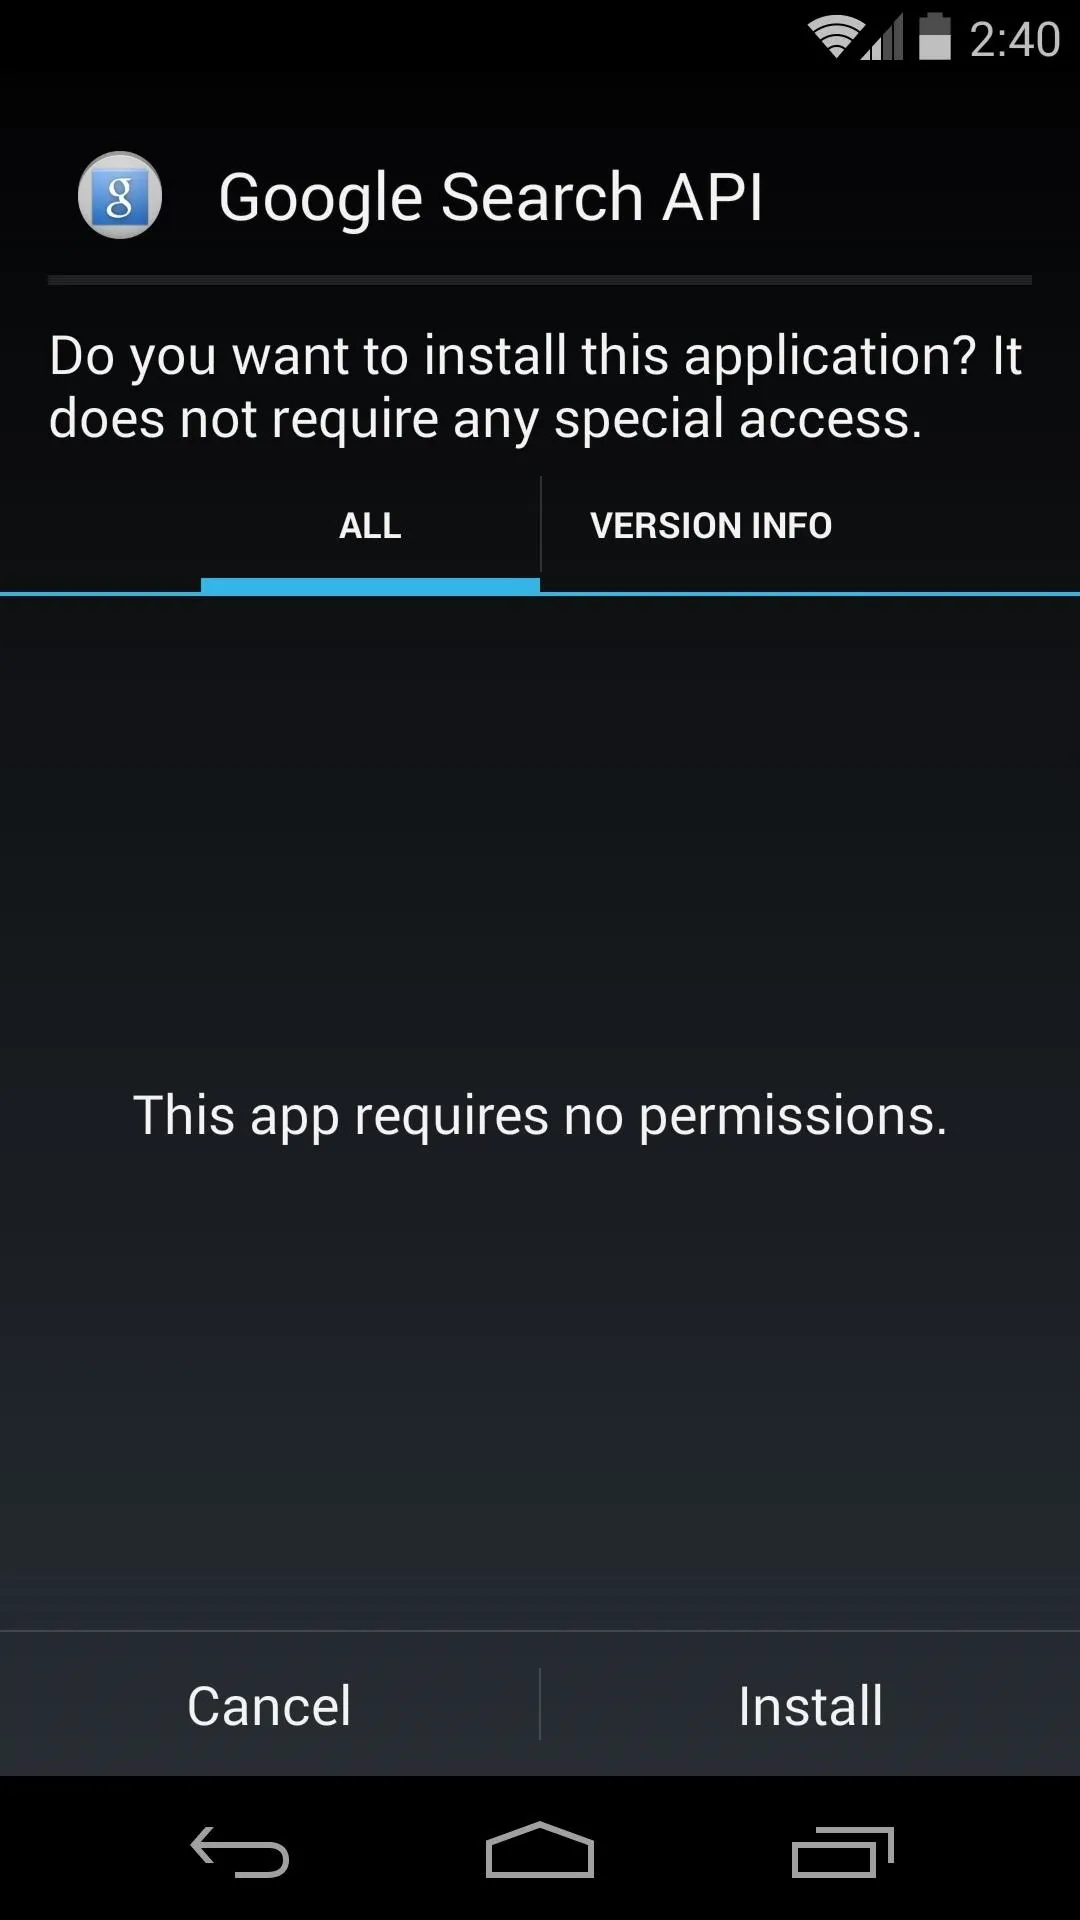
Open the Xposed Installer from your app drawer and head to the Downloads section. Search "Google Search API", tap on the module, and hit "Download" to launch installation.


Step 2: Activate the Google Search API Module & Reboot
Once the installation process is complete, a notification will appear to let you know that the module is not activated yet. Tap this notification, and on the following screen check the box next to Google Search API.

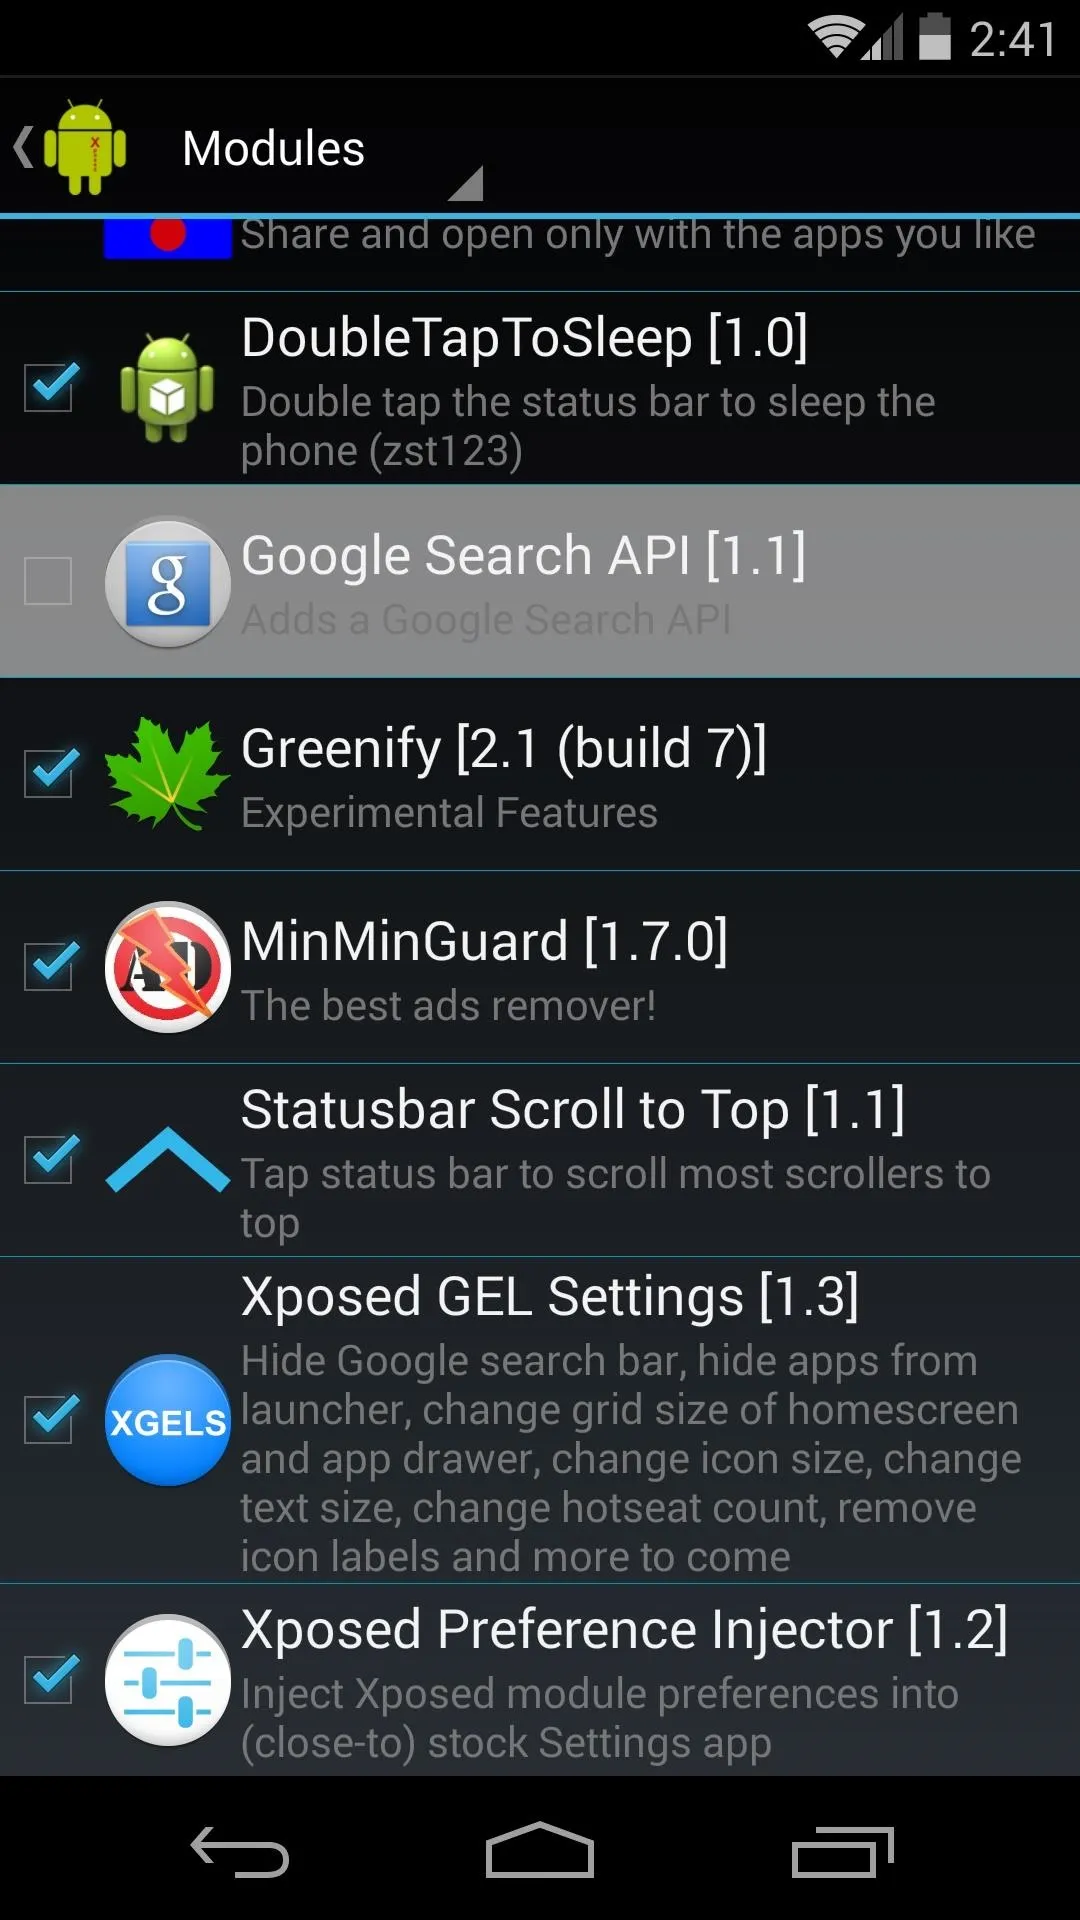


At this point, to make these changes take effect, you'll need to reboot your phone.
Step 3: Set Up Google Search API
Once rebooted, head into the app and check the box next to Delay commands for GEL. This ensures that voice commands aren't misinterpreted as Google searches when triggered from your home screen.
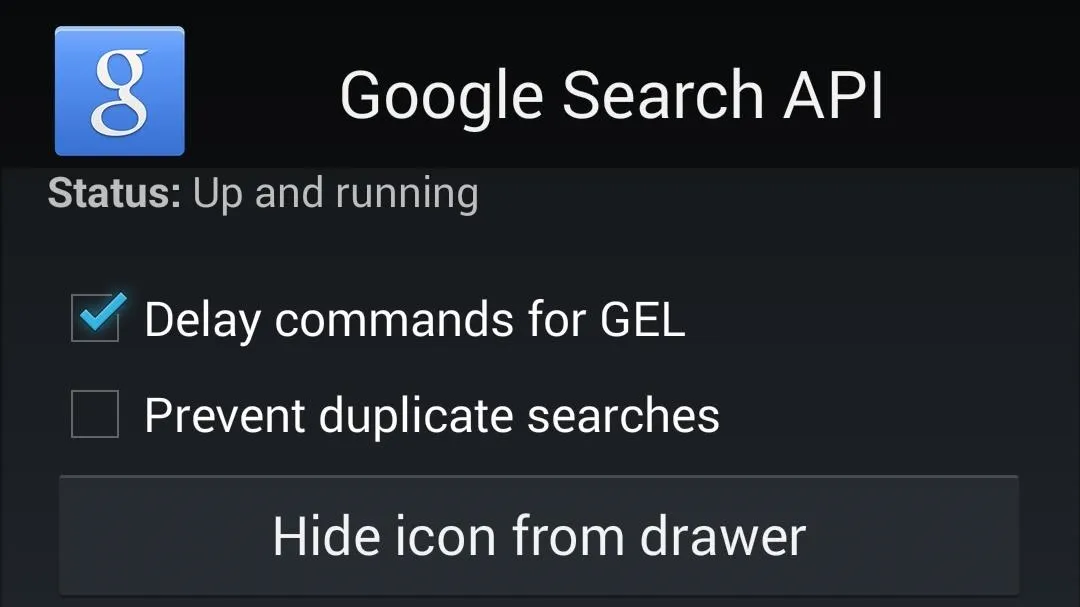
The Prevent duplicate searches option can be left un-ticked unless you experience trouble with duplicate searches.
Step 4: Install the Voice Toggles & Music Controls Plugins
The Google Search API offers plugins to add functionality. First up is Voice Toggles, which adds the ability to toggle Wi-Fi, Bluetooth, and mobile data on or off. Hit this link from your Nexus 5's web browser to download the install file.
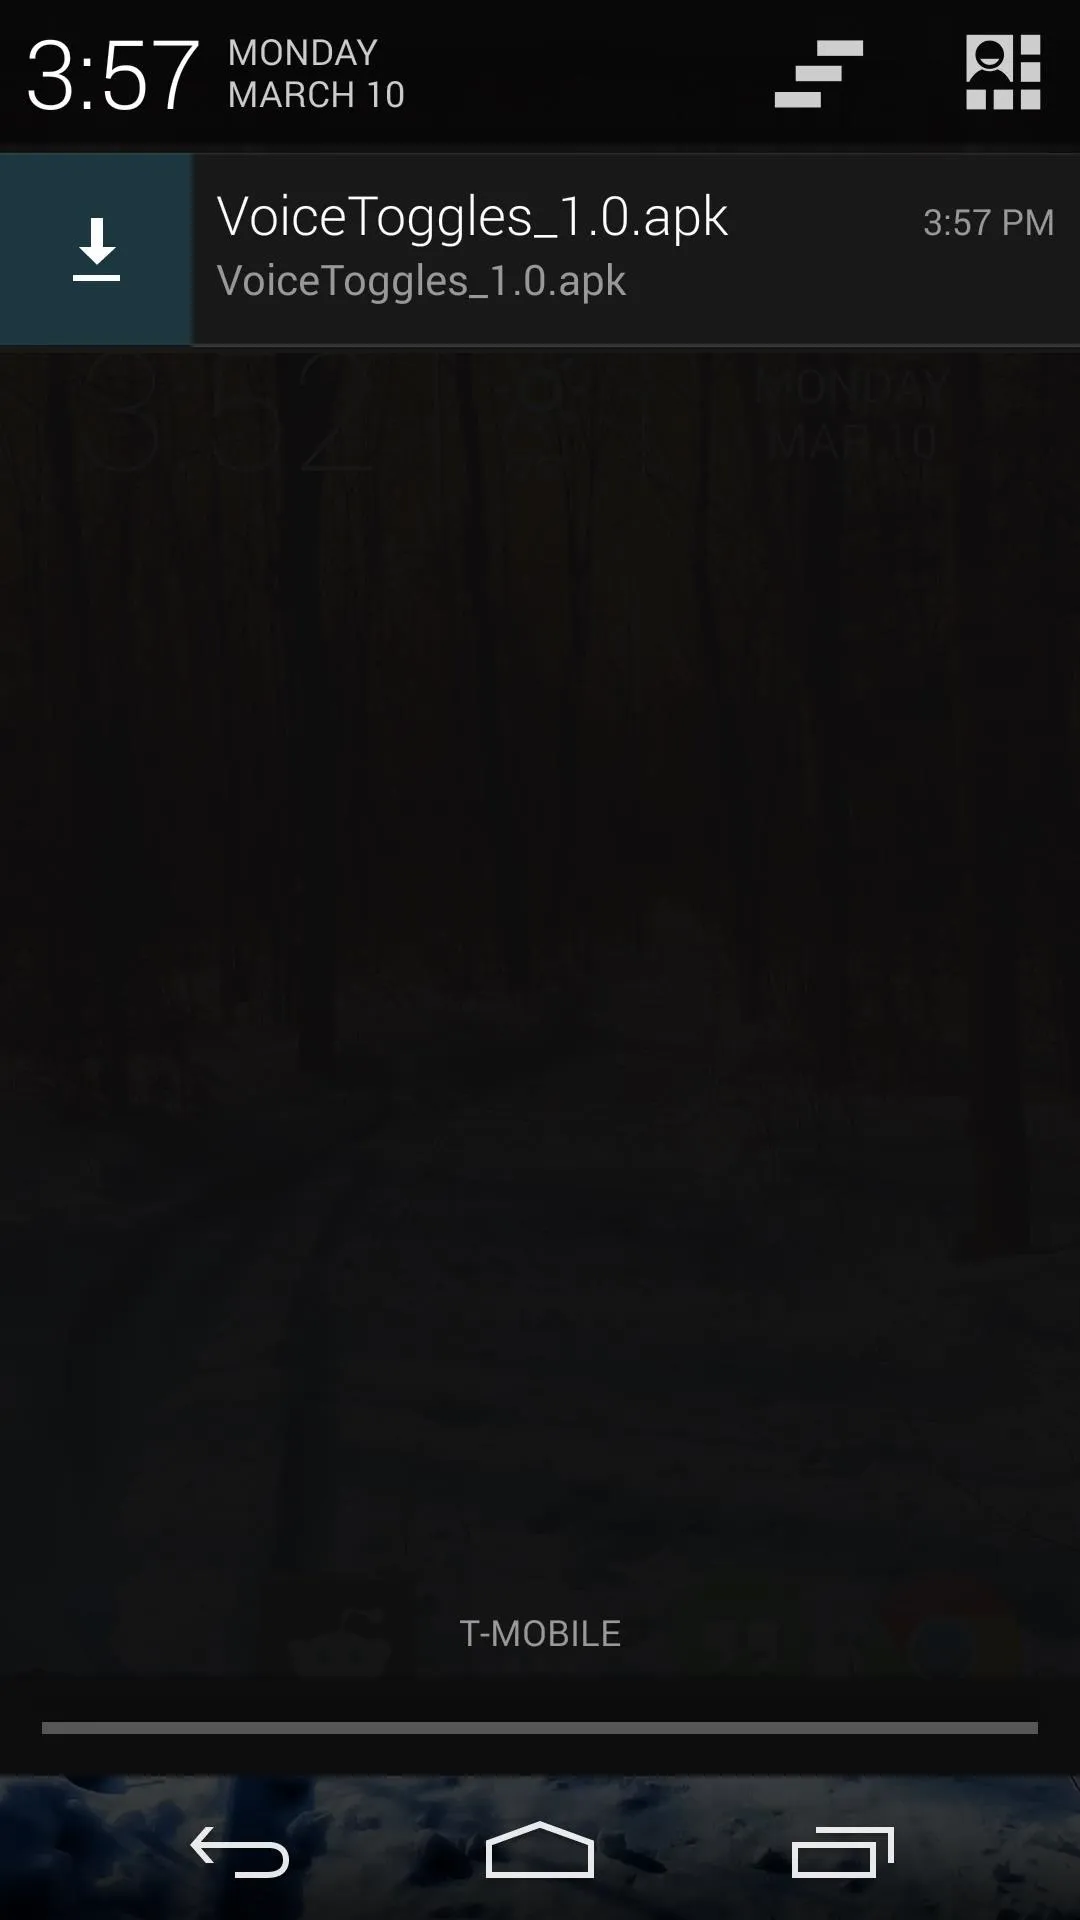
Once the download is finished, click the notification to launch the install process.
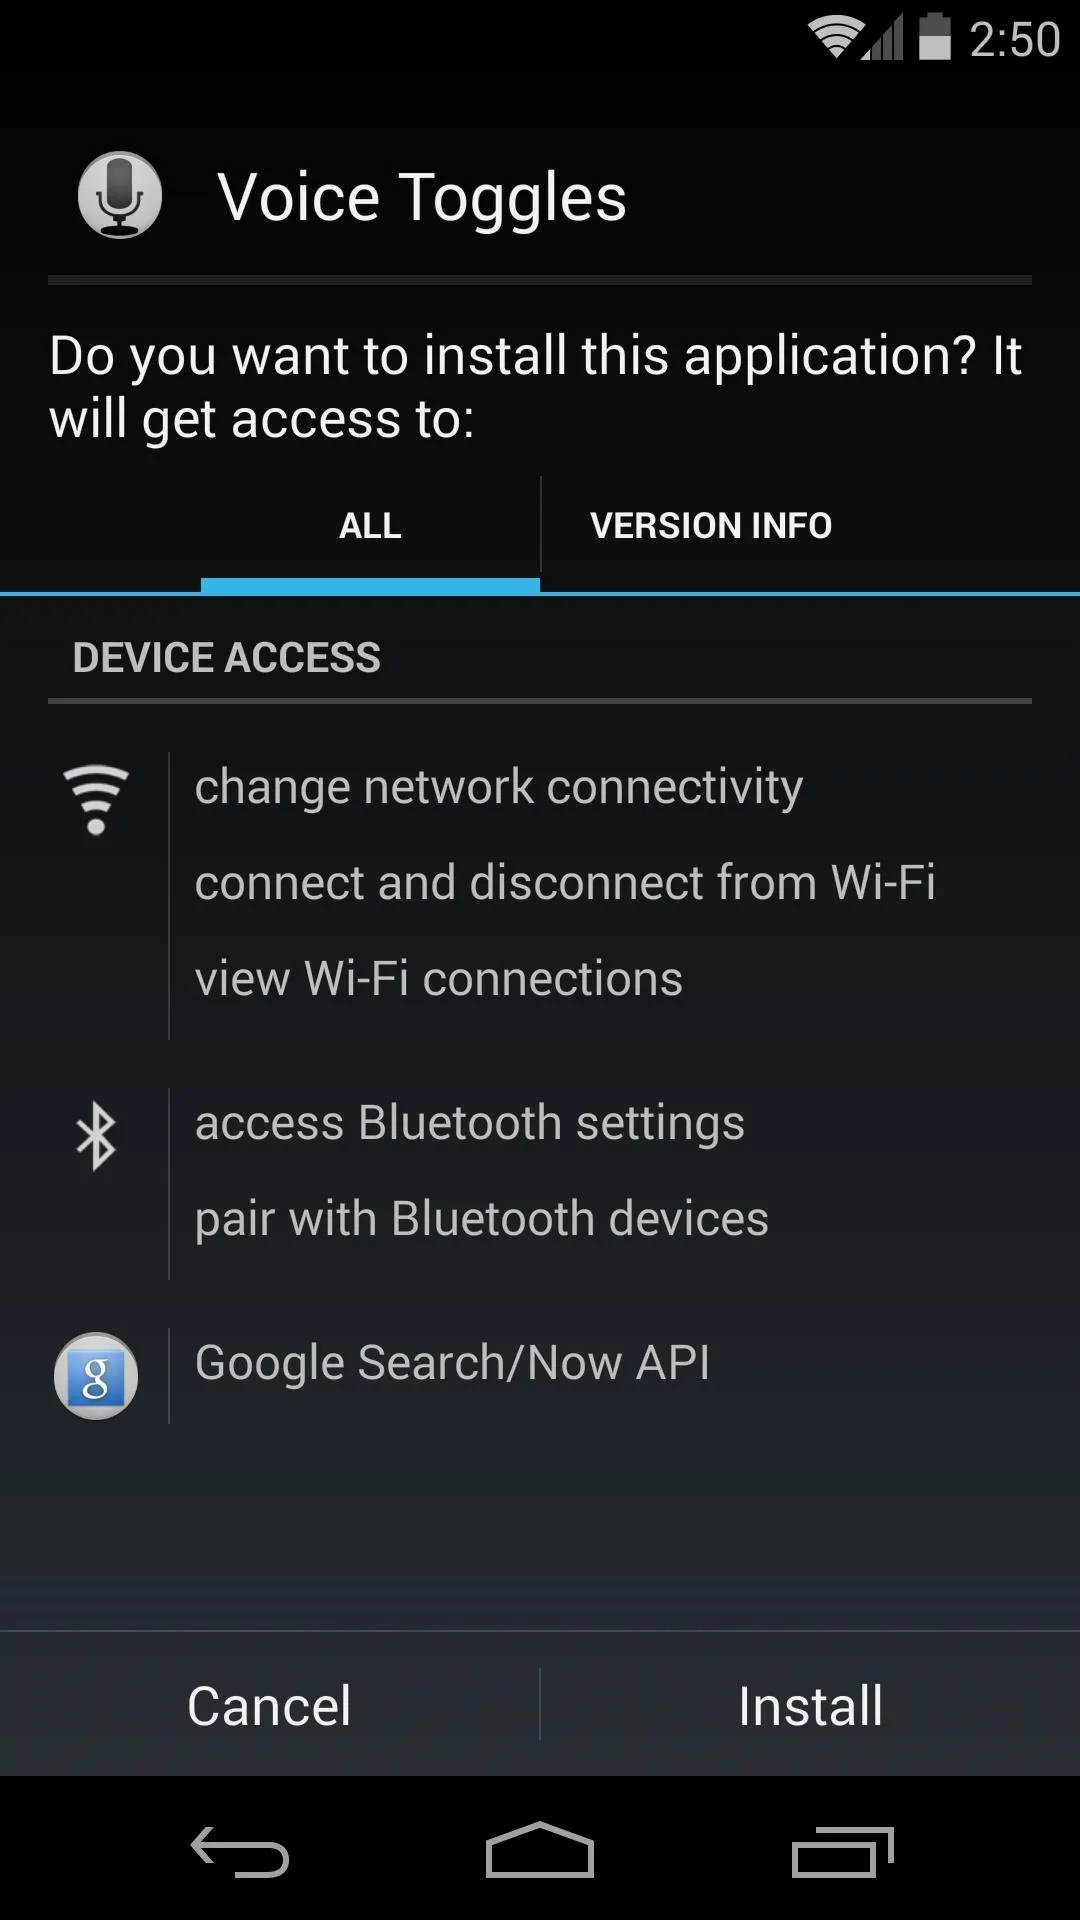


Use the same method to install Music Controls from this link. This plugin will add voice commands for controlling the playback of music on your device.
Step 5: Try Out Some Voice Commands
Without any further configuration, the following voice commands are now available. From your home screen, simply say "Okay, Google" followed by a command to trigger them.
- "Play music"
- "Pause music"
- "Resume music"
- "Play songs by
" - "Play song
"</li><li>"Volume up"</li><li>"Volume down"</li><li>"Volume max"</li><li>"Turn on/off WiFi"</li><li>"Turn on/off Bluetooth"</li><li>"Turn on/off mobile data"</li></ul><h2 class="step">Step 6: Install AutoVoice for Tasker Integration (Optional)</h2><p><strong>AutoVoice</strong> is a Google Search API plugin that also offers a plugin for the automation app <strong>Tasker</strong>. If you don't already have Tasker, tap on <strong><a href="http://tasker.dinglisch.net/releases/Tasker.4.2u3.apk">this link</a></strong> to install a <strong>free 7-day trial</strong>—definitely worthwhile if only to tinker with the functionality that AutoVoice has to offer.</p><div class="image"><img data-id="457352" src="https://assets.content.technologyadvice.com/635302989101740878_96db4fd9ae.webp" alt="635302989101740878.jpg" srcSet="https://assets.content.technologyadvice.com/xsmall_635302989101740878_96db4fd9ae.webp 64w, https://assets.content.technologyadvice.com/thumbnail_635302989101740878_96db4fd9ae.webp 245w, https://assets.content.technologyadvice.com/small_635302989101740878_96db4fd9ae.webp 500w" sizes="(max-width: 70px) 64px, (max-width: 269px) 245px, 500px"></div><p>To install AutoVoice, search for it on the Google Play or use <strong><a href="https://play.google.com/store/apps/details?id=com.joaomgcd.autovoice">this link</a></strong>.</p><div class="image"><img data-id="457365" src="https://assets.content.technologyadvice.com/635302990114086209_aaed8a9084.webp" alt="635302990114086209.jpg" srcSet="https://assets.content.technologyadvice.com/xsmall_635302990114086209_aaed8a9084.webp 64w, https://assets.content.technologyadvice.com/thumbnail_635302990114086209_aaed8a9084.webp 245w, https://assets.content.technologyadvice.com/small_635302990114086209_aaed8a9084.webp 500w" sizes="(max-width: 70px) 64px, (max-width: 269px) 245px, 500px"></div><h2 class="step">Step 7: Configure AutoVoice (Optional)</h2><p>Open AutoVoice, and scroll down to the <strong>Google Now Integration</strong> section. Here you'll need to tick the box next to <strong>Enable</strong> to get it to tie in with the Google Search API.</p><div class="image"><img data-id="457416" src="https://assets.content.technologyadvice.com/635300697985320572_e9edf89961.webp" alt="635300697985320572.jpg" srcSet="https://assets.content.technologyadvice.com/xsmall_635300697985320572_e9edf89961.webp 36w, https://assets.content.technologyadvice.com/thumbnail_635300697985320572_e9edf89961.webp 88w, https://assets.content.technologyadvice.com/small_635300697985320572_e9edf89961.webp 281w, https://assets.content.technologyadvice.com/medium_635300697985320572_e9edf89961.webp 422w, https://assets.content.technologyadvice.com/large_635300697985320572_e9edf89961.webp 562w" sizes="(max-width: 39px) 36px, (max-width: 96px) 88px, (max-width: 309px) 281px, (max-width: 464px) 422px, 562px"></div><div class="image"><img data-id="457451" src="https://assets.content.technologyadvice.com/635300698123447278_2d0f430ef9.webp" alt="635300698123447278.jpg" srcSet="https://assets.content.technologyadvice.com/xsmall_635300698123447278_2d0f430ef9.webp 36w, https://assets.content.technologyadvice.com/thumbnail_635300698123447278_2d0f430ef9.webp 88w, https://assets.content.technologyadvice.com/small_635300698123447278_2d0f430ef9.webp 281w, https://assets.content.technologyadvice.com/medium_635300698123447278_2d0f430ef9.webp 422w, https://assets.content.technologyadvice.com/large_635300698123447278_2d0f430ef9.webp 562w" sizes="(max-width: 39px) 36px, (max-width: 96px) 88px, (max-width: 309px) 281px, (max-width: 464px) 422px, 562px"></div><p>Next, tap the <strong>Search Type</strong> entry to choose whether you want AutoVoice to trigger events when you search by voice, by typing, or both. For the purposes of this tutorial, the rest of the AutoVoice settings can be left at their default values.</p><h2 class="step">Step 8: Get Creative with Tasker & AutoVoice (Optional)</h2><p>AutoVoice lets you set custom commands that can in turn trigger a Tasker task. This means that almost anything your phone can do can be triggered by voice. The possibilities are virtually endless, but I'll walk you through a relatively simple example here to get you started.</p><p>Open Tasker and hit the plus button at the bottom to create a new profile. In the following menus, select <strong>State</strong>, then <strong>Plugin</strong>, then <strong>AutoVoice Recognized</strong>.</p><div class="image"><img data-id="457469" src="https://assets.content.technologyadvice.com/635300736066884997_568bced5e9.webp" alt="635300736066884997.jpg" srcSet="https://assets.content.technologyadvice.com/xsmall_635300736066884997_568bced5e9.webp 36w, https://assets.content.technologyadvice.com/thumbnail_635300736066884997_568bced5e9.webp 88w, https://assets.content.technologyadvice.com/small_635300736066884997_568bced5e9.webp 281w, https://assets.content.technologyadvice.com/medium_635300736066884997_568bced5e9.webp 422w, https://assets.content.technologyadvice.com/large_635300736066884997_568bced5e9.webp 562w" sizes="(max-width: 39px) 36px, (max-width: 96px) 88px, (max-width: 309px) 281px, (max-width: 464px) 422px, 562px"></div><div class="image"><img data-id="457494" src="https://assets.content.technologyadvice.com/635300736587664946_777061893d.webp" alt="635300736587664946.jpg" srcSet="https://assets.content.technologyadvice.com/xsmall_635300736587664946_777061893d.webp 36w, https://assets.content.technologyadvice.com/thumbnail_635300736587664946_777061893d.webp 88w, https://assets.content.technologyadvice.com/small_635300736587664946_777061893d.webp 281w, https://assets.content.technologyadvice.com/medium_635300736587664946_777061893d.webp 422w, https://assets.content.technologyadvice.com/large_635300736587664946_777061893d.webp 562w" sizes="(max-width: 39px) 36px, (max-width: 96px) 88px, (max-width: 309px) 281px, (max-width: 464px) 422px, 562px"></div><div class="image"><img data-id="457512" src="https://assets.content.technologyadvice.com/635300736724539191_3a5d838dc6.webp" alt="635300736724539191.jpg" srcSet="https://assets.content.technologyadvice.com/xsmall_635300736724539191_3a5d838dc6.webp 36w, https://assets.content.technologyadvice.com/thumbnail_635300736724539191_3a5d838dc6.webp 88w, https://assets.content.technologyadvice.com/small_635300736724539191_3a5d838dc6.webp 281w, https://assets.content.technologyadvice.com/medium_635300736724539191_3a5d838dc6.webp 422w, https://assets.content.technologyadvice.com/large_635300736724539191_3a5d838dc6.webp 562w" sizes="(max-width: 39px) 36px, (max-width: 96px) 88px, (max-width: 309px) 281px, (max-width: 464px) 422px, 562px"></div><p>In the ensuing screen, hit the pencil-shaped edit button near the top-right. This will open an AutoVoice configuration dialog.</p><div class="image"><img data-id="457555" src="https://assets.content.technologyadvice.com/635300742950788966_f46975c39c.webp" alt="635300742950788966.jpg" srcSet="https://assets.content.technologyadvice.com/xsmall_635300742950788966_f46975c39c.webp 64w, https://assets.content.technologyadvice.com/thumbnail_635300742950788966_f46975c39c.webp 245w, https://assets.content.technologyadvice.com/small_635300742950788966_f46975c39c.webp 500w, https://assets.content.technologyadvice.com/medium_635300742950788966_f46975c39c.webp 750w, https://assets.content.technologyadvice.com/large_635300742950788966_f46975c39c.webp 1000w" sizes="(max-width: 70px) 64px, (max-width: 269px) 245px, (max-width: 550px) 500px, (max-width: 825px) 750px, 1000px"></div><p>Tick the box next to the top option, <strong>Event Behaviour</strong>, then scroll down and click <strong>Command Filter</strong>. This is the word that, if spoken on the home screen following the "Okay, Google" trigger, will launch the task you will create. The free version of AutoVoice limits this word to 4 characters, so in this example we'll enter the word "time". Hit the check icon near the top-right to save your entries.</p><div class="image"><img data-id="457585" src="https://assets.content.technologyadvice.com/635300741274539177_f082737c17.webp" alt="635300741274539177.jpg" srcSet="https://assets.content.technologyadvice.com/xsmall_635300741274539177_f082737c17.webp 36w, https://assets.content.technologyadvice.com/thumbnail_635300741274539177_f082737c17.webp 88w, https://assets.content.technologyadvice.com/small_635300741274539177_f082737c17.webp 281w, https://assets.content.technologyadvice.com/medium_635300741274539177_f082737c17.webp 422w, https://assets.content.technologyadvice.com/large_635300741274539177_f082737c17.webp 562w" sizes="(max-width: 39px) 36px, (max-width: 96px) 88px, (max-width: 309px) 281px, (max-width: 464px) 422px, 562px"></div><div class="image"><img data-id="457619" src="https://assets.content.technologyadvice.com/635300741446414686_9f93abb86b.webp" alt="635300741446414686.jpg" srcSet="https://assets.content.technologyadvice.com/xsmall_635300741446414686_9f93abb86b.webp 36w, https://assets.content.technologyadvice.com/thumbnail_635300741446414686_9f93abb86b.webp 88w, https://assets.content.technologyadvice.com/small_635300741446414686_9f93abb86b.webp 281w, https://assets.content.technologyadvice.com/medium_635300741446414686_9f93abb86b.webp 422w, https://assets.content.technologyadvice.com/large_635300741446414686_9f93abb86b.webp 562w" sizes="(max-width: 39px) 36px, (max-width: 96px) 88px, (max-width: 309px) 281px, (max-width: 464px) 422px, 562px"></div><div class="image"><img data-id="457648" src="https://assets.content.technologyadvice.com/635300741573288965_6645a5f2dd.webp" alt="635300741573288965.jpg" srcSet="https://assets.content.technologyadvice.com/xsmall_635300741573288965_6645a5f2dd.webp 36w, https://assets.content.technologyadvice.com/thumbnail_635300741573288965_6645a5f2dd.webp 88w, https://assets.content.technologyadvice.com/small_635300741573288965_6645a5f2dd.webp 281w, https://assets.content.technologyadvice.com/medium_635300741573288965_6645a5f2dd.webp 422w, https://assets.content.technologyadvice.com/large_635300741573288965_6645a5f2dd.webp 562w" sizes="(max-width: 39px) 36px, (max-width: 96px) 88px, (max-width: 309px) 281px, (max-width: 464px) 422px, 562px"></div><p>From here, hit your phone's back button and you will be prompted to select a task to attach to this profile. Click <strong>New Task</strong>, then at the next prompt enter a name for your task and hit the check button.</p><div class="image"><img data-id="457675" src="https://assets.content.technologyadvice.com/635300746052197667_c0e17a1dfc.webp" alt="635300746052197667.jpg" srcSet="https://assets.content.technologyadvice.com/xsmall_635300746052197667_c0e17a1dfc.webp 36w, https://assets.content.technologyadvice.com/thumbnail_635300746052197667_c0e17a1dfc.webp 88w, https://assets.content.technologyadvice.com/small_635300746052197667_c0e17a1dfc.webp 281w, https://assets.content.technologyadvice.com/medium_635300746052197667_c0e17a1dfc.webp 422w, https://assets.content.technologyadvice.com/large_635300746052197667_c0e17a1dfc.webp 562w" sizes="(max-width: 39px) 36px, (max-width: 96px) 88px, (max-width: 309px) 281px, (max-width: 464px) 422px, 562px"></div><div class="image"><img data-id="457708" src="https://assets.content.technologyadvice.com/635300746227038900_bac1c81d86.webp" alt="635300746227038900.jpg" srcSet="https://assets.content.technologyadvice.com/xsmall_635300746227038900_bac1c81d86.webp 36w, https://assets.content.technologyadvice.com/thumbnail_635300746227038900_bac1c81d86.webp 88w, https://assets.content.technologyadvice.com/small_635300746227038900_bac1c81d86.webp 281w, https://assets.content.technologyadvice.com/medium_635300746227038900_bac1c81d86.webp 422w, https://assets.content.technologyadvice.com/large_635300746227038900_bac1c81d86.webp 562w" sizes="(max-width: 39px) 36px, (max-width: 96px) 88px, (max-width: 309px) 281px, (max-width: 464px) 422px, 562px"></div><p>Hit the plus button at the bottom of the next screen, and in this example, we'll select <strong>App</strong> from the following list. Now click <strong>Load App</strong> and select <strong>Clock</strong> from the list. Hit the back button three times to back entirely out of Tasker so that your new profile will become active.</p><div class="image"><img data-id="457748" src="https://assets.content.technologyadvice.com/635300749382351561_a81344981a.webp" alt="635300749382351561.jpg" srcSet="https://assets.content.technologyadvice.com/xsmall_635300749382351561_a81344981a.webp 36w, https://assets.content.technologyadvice.com/thumbnail_635300749382351561_a81344981a.webp 88w, https://assets.content.technologyadvice.com/small_635300749382351561_a81344981a.webp 281w, https://assets.content.technologyadvice.com/medium_635300749382351561_a81344981a.webp 422w, https://assets.content.technologyadvice.com/large_635300749382351561_a81344981a.webp 562w" sizes="(max-width: 39px) 36px, (max-width: 96px) 88px, (max-width: 309px) 281px, (max-width: 464px) 422px, 562px"></div><div class="image"><img data-id="457785" src="https://assets.content.technologyadvice.com/635300749525635249_b783c819bb.webp" alt="635300749525635249.jpg" srcSet="https://assets.content.technologyadvice.com/xsmall_635300749525635249_b783c819bb.webp 36w, https://assets.content.technologyadvice.com/thumbnail_635300749525635249_b783c819bb.webp 88w, https://assets.content.technologyadvice.com/small_635300749525635249_b783c819bb.webp 281w, https://assets.content.technologyadvice.com/medium_635300749525635249_b783c819bb.webp 422w, https://assets.content.technologyadvice.com/large_635300749525635249_b783c819bb.webp 562w" sizes="(max-width: 39px) 36px, (max-width: 96px) 88px, (max-width: 309px) 281px, (max-width: 464px) 422px, 562px"></div><div class="image"><img data-id="457820" src="https://assets.content.technologyadvice.com/635300749682820570_d56d9f77b8.webp" alt="635300749682820570.jpg" srcSet="https://assets.content.technologyadvice.com/xsmall_635300749682820570_d56d9f77b8.webp 36w, https://assets.content.technologyadvice.com/thumbnail_635300749682820570_d56d9f77b8.webp 88w, https://assets.content.technologyadvice.com/small_635300749682820570_d56d9f77b8.webp 281w, https://assets.content.technologyadvice.com/medium_635300749682820570_d56d9f77b8.webp 422w, https://assets.content.technologyadvice.com/large_635300749682820570_d56d9f77b8.webp 562w" sizes="(max-width: 39px) 36px, (max-width: 96px) 88px, (max-width: 309px) 281px, (max-width: 464px) 422px, 562px"></div><p>From your home screen now, say "Okay, Google" followed by the command filter you entered—in this case "time".</p><div class="image"><img data-id="457852" src="https://assets.content.technologyadvice.com/635300751512197385_96baae0a3e.webp" alt="635300751512197385.jpg" srcSet="https://assets.content.technologyadvice.com/xsmall_635300751512197385_96baae0a3e.webp 36w, https://assets.content.technologyadvice.com/thumbnail_635300751512197385_96baae0a3e.webp 88w, https://assets.content.technologyadvice.com/small_635300751512197385_96baae0a3e.webp 281w, https://assets.content.technologyadvice.com/medium_635300751512197385_96baae0a3e.webp 422w, https://assets.content.technologyadvice.com/large_635300751512197385_96baae0a3e.webp 562w" sizes="(max-width: 39px) 36px, (max-width: 96px) 88px, (max-width: 309px) 281px, (max-width: 464px) 422px, 562px"></div><div class="image"><img data-id="457868" src="https://assets.content.technologyadvice.com/635300751633615020_f6b5ab37d1.webp" alt="635300751633615020.jpg" srcSet="https://assets.content.technologyadvice.com/xsmall_635300751633615020_f6b5ab37d1.webp 36w, https://assets.content.technologyadvice.com/thumbnail_635300751633615020_f6b5ab37d1.webp 88w, https://assets.content.technologyadvice.com/small_635300751633615020_f6b5ab37d1.webp 281w, https://assets.content.technologyadvice.com/medium_635300751633615020_f6b5ab37d1.webp 422w, https://assets.content.technologyadvice.com/large_635300751633615020_f6b5ab37d1.webp 562w" sizes="(max-width: 39px) 36px, (max-width: 96px) 88px, (max-width: 309px) 281px, (max-width: 464px) 422px, 562px"></div><p>This is just one simple example, but as I said earlier, the possibilities are nearly endless.</p><div class="image"><img data-id="457892" src="https://assets.content.technologyadvice.com/635300756643133018_16e3a04e93.webp" alt="635300756643133018.jpg" srcSet="https://assets.content.technologyadvice.com/xsmall_635300756643133018_16e3a04e93.webp 64w, https://assets.content.technologyadvice.com/thumbnail_635300756643133018_16e3a04e93.webp 245w, https://assets.content.technologyadvice.com/small_635300756643133018_16e3a04e93.webp 500w" sizes="(max-width: 70px) 64px, (max-width: 269px) 245px, 500px"></div><p>The only real limitation here is your own imagination, so get creative. From home automation to Chromecasting, your Nexus 5 will now obey your every command.</p>


Comments
No Comments Exist
Be the first, drop a comment!